
If you’re on the hunt for a new shaving routine or just want to mix things up, making your own homemade shaving soap might be the answer. You won’t believe how easy it is to make your own shaving soap. The mixture of oils and lather-producing ingredients means you can have soft skin and an even shave in no time at all. If you’re ready to ditch those commercialized shaving creams and gels, then read on to find out how you can make homemade shaving soap that leaves your skin feeling smooth, not irritated. Prepare to say goodbye to those gross chemical-filled store-bought brands once and for all!
Related Posts:
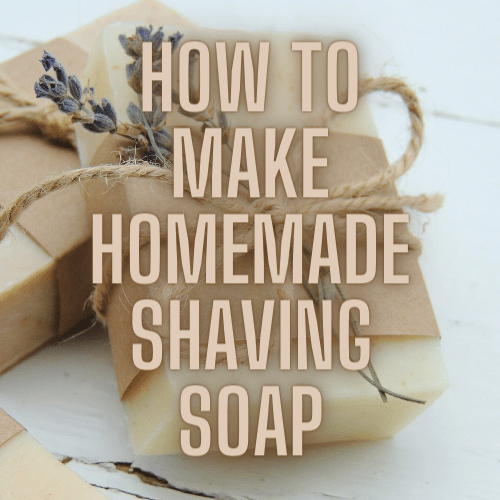
What You’ll Need to Make Homemade Shaving Soap
The key ingredients you’ll need to make your own shaving soap include a lather-producing ingredient such as coconut oil or shea butter, a cleanser, such as castor or olive oil, and some essential oils for scent. You’ll also need a couple of bowls, a wooden or plastic spoon, a measuring cup or jug, and a stick blender. In addition to the aforementioned ingredients, you’ll also need a scale, a heating element, a thermometer, and a mold. The mold can be any shape or size, but it should be made from something that won’t react with the ingredients in your shaving soap.
The list of ingredients is:
- Aloe Vera Gel (optional, great for the skin)
- Shea butter (naturally hydrates the skin)
- Olive or Almond oil (optional)
- Vitamin E oil as a preservative (optional)
- Castor oil or coconut oil (high in stearic acid, creates lather)
- Essential oils for scent
- Potassium Hydroxide (optional, reacts with fat in coconut oil/castor oil to create soap properties)
If you decide to use potassium hydroxide, keep in mind that it is caustic and can cause burns to your skin, and precautions are needed. This ingredient would be added during the heating phase.
Step 1: Gather the ingredients
First up, you’ll need to weigh out your oils. Take a large bowl and add your water, shea butter, and coconut oil (or castor oil). The ratio you’ll need to use will depend on how firm or soft you want your shaving soap to be. For normal-to-firm shaving soap, you’ll need 50% coconut oil. For a softer soap, you can use up to 75%. For a firmer consistency, you’ll need a smaller amount of coconut oil.
Water should be added in small amounts at a time to reach the desired consistency.

Essential oils and other optional ingredients should be added in small quantities to your preference.
Step 2: Mix your ingredients
Once you’re happy with your ratios, add your primary ingredients (coconut oil, castor oil, shea butter, and water) and stir the ingredients together well while warming (do not boil). Leave the mixture for around 20 minutes to cool.
Step 3: Add the scented oils
Once your base ingredients have cooled, you can start to add your essential oils and your vitamin E. Vitamin E oil has moisturizing properties and also increases the shelf-life of your homemade shaving soap significantly.
It’s best to add the oils slowly, as you don’t want to add too much. It’s always better to add a little at a time if you think you need it, rather than adding too much initially and wasting your ingredients. Once you’ve added enough essential oils to get the desired scents and properties, you’ll need to mold it.
Step 4: Pour and cut your soap
For your shaving soap to set, you’ll need to leave it to cure for around 48 hours. During this time, it will harden and will be ready for use. You’ll need to line your mold with parchment paper before you pour the mixture into it. Once you’re ready to pour, use a jug or measuring cup to evenly distribute the soap. Leave the soap in the mold to set for around 24 hours before you move on to the next step.
Once the soap has set, remove the mold and cut your soap into bars. You can use a knife or a soap cutter to achieve even slices. Leave your bars to dry for a couple more days so they will be ready to use.
Alternatively, if you used molds that have shapes simply remove the soap pucks from the mold and set them aside to finish curing.
Step 5: Allow to cure
Now that your shaving soap has been set and cut, it’s ready for use. Although you can use it immediately, it’s best to leave it to cure for a couple of days or even weeks. This will allow the ingredients to fully settle, making your soap last even longer. During the curing process, your soap will harden the longer you leave it.
Bonus Tips
While you’re waiting for your shaving soap to cure, you can make an alcohol-based aftershave by mixing together witch hazel and alcohol, such as Isopropyl. Witch hazel has anti-inflammatory properties that can soothe irritated skin and stop ingrown hairs from forming, while alcohol will close your pores and keep bacteria at bay. You can also use witch hazel as an astringent, meaning that it will help to tighten pores and remove excess oil from your skin.
Conclusion
Making your own shaving soap is an easy way to ensure that your skin is kept in good condition. You can adjust the ingredients to ensure that your skin is kept hydrated and free from irritation. Making homemade shaving soap is great because you know exactly what is going into it. As a bonus, you can tweak your recipe to get the perfect soap for your skin type.
Your shaving soap should last for a very long time if you store it correctly. Place it in a re-sealable bag or airtight jar and keep it in a cool, dry place away from direct sunlight. While you don’t need to replace your shaving soap every shave, you may want to make a fresh batch every so often. This will ensure that it stays fresh and doesn’t dry out completely.